• Skip to main content
  • Skip to primary sidebar
  • Skip to footer

Easy Recipes List logo

  • Recipes
    • Easy Carrot Cake Recipes
    • Easy Coffee Cake Recipes
    • Easy Chocolate Cake Recipes
    • Easy Banana Cake Recipes
    • Easy Cream Cake Recipes
  • About
  • Contact Us

Recipes

Cold Foam Recipe

July 29, 2025

So let me paint you a little picture. It’s a Saturday morning in my kitchen, early enough that the sunlight is still stretching through the windows in these long, golden stripes. I’ve got my coffee mug in one hand, and in the other? A frother that’s about to work some magic. That’s kinda how this cold foam recipe became part of my everyday routine.

I used to be one of those people who’d hit the drive-thru just to get that silky cloud of sweet cream floating on top of an iced coffee. Starbucks really had me wrapped around their little green straw. But one day, after seeing that extra $1.25 charge for a splash of foam (come on now), I figured… maybe it’s time to whip up my own version. Literally.

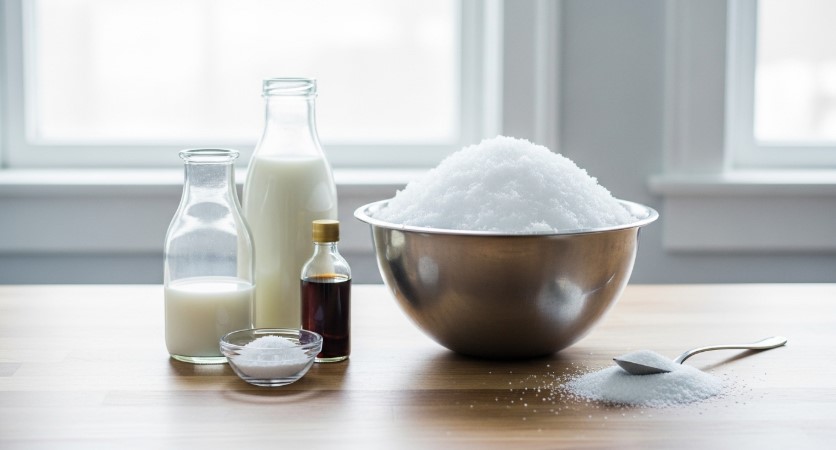
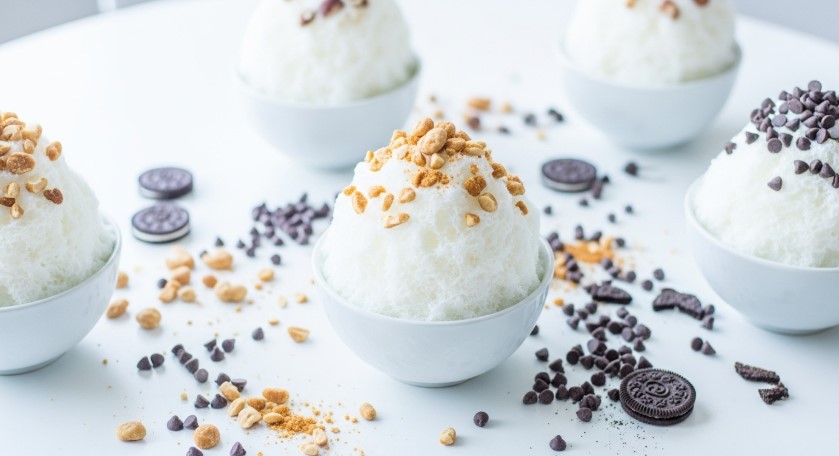
That’s where this sweet cream cold foam recipe was born. And let me tell you — if you’re into chill treats like my Ninja Creami recipe or that throwback snow ice cream, you’ll totally appreciate this one too. It’s honestly so easy — like, dangerously easy. You only need a few things: whole milk, a splash of heavy cream, a bit of vanilla, and a sprinkle of powdered sugar. Give it all a whirl with a frother or a quick shake in a jar, and boom — you’ve got yourself a fancy coffee topper that rivals anything from the coffee shop.

Homemade sweet cream cold foam in kitchen light
Cold foam ready to top your favorite iced brew

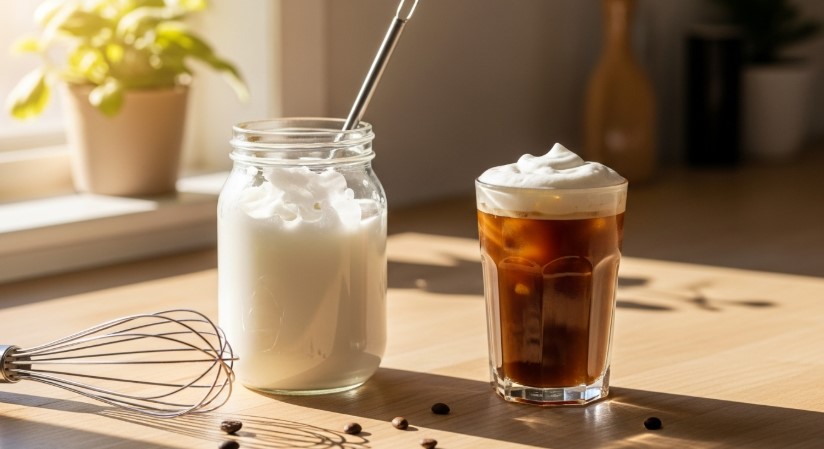
That’s where this sweet cream cold foam recipe was born. It’s honestly so easy — like, dangerously easy. You only need a few things: whole milk, a splash of heavy cream, a bit of vanilla, and a sprinkle of powdered sugar. Give it all a whirl with a frother or a quick shake in a jar, and boom — you’ve got yourself a fancy coffee topper that rivals anything from the coffee shop.

What I love most is how flexible this is. You can swap out the heavy cream for something lighter if you’re trying to cut back — almond milk works surprisingly well, though it won’t be quite as creamy. This is also my go-to cold foam recipe without heavy cream when I’m running low. And if you want to go vanilla all the way? Add a touch more extract, and boom — you’ve got the perfect vanilla cold foam recipe too.

Frothing sweet cream cold foam
Frothing the mixture creates that signature silky texture

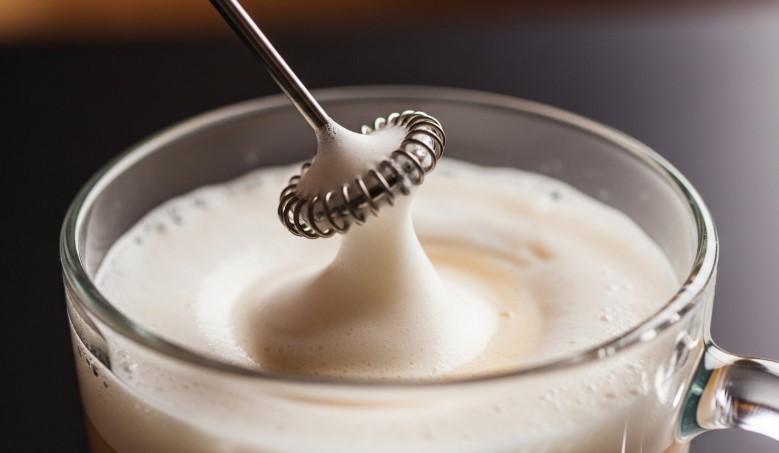
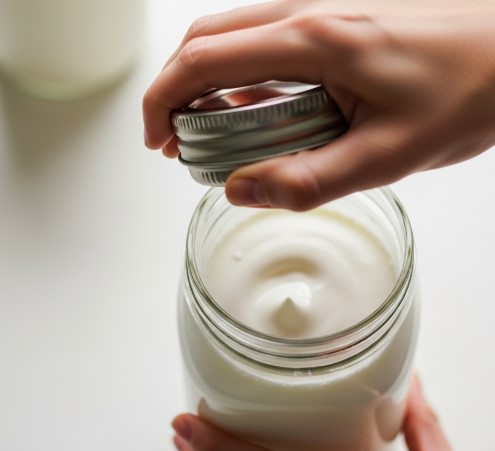
And hey, if you’re wondering whether a frother’s really worth it — let me just say this: once you’ve used one, you’ll find yourself frothing everything. But no worries if you don’t have one. Just grab a mason jar, screw the lid on tight, and give it a good ol’ shake. I’ve done that plenty of times when I didn’t feel like pulling out gadgets.

Best part? This stuff doesn’t just sit pretty on iced coffee. It blends into hot drinks just as well, giving every sip that silky-sweet upgrade. But I will say, don’t let it sit too long — cold foam does separate if you let it hang out. Not a dealbreaker though. Just give it a quick stir and you’re back in business.

Making cold foam without a frother
You don’t need fancy tools — just shake it up

FAQs

How to make cold foam at home?

Add milk, cream, vanilla, and powdered sugar to a jar or glass, then shake it like you mean it or hit it with a frother until it gets all thick and fluffy.

What is cold foam made of?

Most times, it’s just milk and cream with something sweet like vanilla and sugar. The texture? Think light whipped cream but still pourable.

How to make foam at home?

You can use a milk frother, a French press, or even a tightly sealed jar. Shake or pump it till it gets airy.

What milk is best for cold foam?

Whole milk gives you the richest foam, but 2%, oat, or almond can work too. Just don’t expect it to be quite as creamy.

Iced coffee with sweet cream cold foam
Cold foam makes every sip a treat
Print

Cold Foam Recipe

Iced coffee with sweet cream cold foam
Print Recipe
Print Recipe

5 Stars 4 Stars 3 Stars 2 Stars 1 Star

No reviews

Sweet cream cold foam is a dreamy, pourable coffee topper that’s creamy, lightly sweet, and insanely easy to make at home. You’ll save money and skip the coffee shop line — just froth and pour!

  • Author: Michael Carter
  • Prep Time: 2 minutes
  • Cook Time: 0 minutes
  • Total Time: 2 minutes
  • Yield: 2 servings (about ⅓ cup each) 1x
  • Category: Drink
  • Method: Frothing or Shaking
  • Cuisine: American

Ingredients

Scale

¼ cup whole milk

2 Tbsp heavy cream

¼ tsp vanilla extract

1 Tbsp powdered sugar¼ cup whole milk

2 Tbsp heavy cream

¼ tsp vanilla extract

1 Tbsp powdered sugar

Instructions

  1. Add the milk, cream, vanilla extract, and powdered sugar to a glass or an 8oz jar.
  2. Use a milk frother to whip the mixture into a thick, smooth foam.
  3. Or, seal the jar and shake vigorously for about 30 seconds until foamy.
  4. Pour the sweet cream cold foam over your favorite hot or iced coffee.

Notes

  • If you’re skipping heavy cream, just use more whole milk or even oat milk. It’ll still foam, just not as thick.
  • Want a stronger vanilla flavor? Add a tiny splash more extract.
  • Use it right away — it can separate if it sits too long. Just re-stir if that happens.
  • Got leftovers? Store in the fridge and re-froth when ready.

Nutrition

  • Serving Size: ⅓ cup
  • Calories: 86kcal
  • Sugar: 6g
  • Sodium: 16mg
  • Fat: 6g
  • Carbohydrates: 6g
  • Protein: 1g

Did you make this recipe?

Share a photo and tag us — we can’t wait to see what you’ve made!

Filed Under: Drinks

Snow Ice Cream Recipe

July 27, 2025

So let me take you back for a second… Picture Philly in the middle of a quiet snowstorm, one of those afternoons when the whole world feels hushed, wrapped in white. I must’ve been 9 or 10, bundled up in a hand-me-down jacket, mittens barely keeping the snow out, and this ridiculous red scarf my Nonna insisted on wrapping around my neck like a boa constrictor. I was freezing… but also totally hyped, because snow meant one thing: snow ice cream. Not just any ice cream, though. We’re talkin’ the old fashioned snow ice cream recipe—the kind that doesn’t come from a carton but from the backyard, a big metal bowl, and a whole lotta love.

(If you’re into other nostalgic treats, check out my strawberry margarita recipe and this creamy dream of a pistachio cream recipe. Both are crowd-pleasers in their own right.)

My mom would holler from the kitchen window, “Go scoop the clean stuff! Not the yellow snow, Mikey!” And off I’d go with a big ol’ grin and a stainless steel bowl. This stuff was a legit event in our house. We didn’t need fancy machines or store-bought anything. Just a few humble pantry staples and the magic that came from snowflakes and patience.

Snow ice cream ingredients on kitchen counter
Gathering snow ice cream ingredients in the kitchen

These days, whenever winter rolls around and snow blankets our little street here in California (ok, not really—but hey, we travel!), I can’t help but crave that creamy, sweet, snow-kissed bite. And now? I make this easy snow ice cream recipe with my nieces. We gather up the fluffiest snow, stir in some vanilla, milk, and sugar, and watch their faces light up like it’s the first snowfall of the year.

Child holding snow ice cream with sprinkles
Snow day treat topped with sprinkles

This recipe is fast—like, “done in the time it takes to find matching mittens” fast. We’re talkin’ 5 minutes to whip up what might just be the best snow ice cream recipe you’ve ever tasted. You can even switch it up by using condensed milk if you’re feelin’ extra indulgent. Heck, I’ve done it with chocolate almond milk before, and it was chef’s kiss.

So whether you’re trying this for the first time or bringing back a childhood memory, this one’s for you. From my snow-dusted heart to your spoon.

Snow ice cream toppings and mix-ins
Create-your-own snow cream bar with toppings

FAQs

What ingredients do you need for snow ice cream?

You just need five basics: fresh clean snow (or shaved ice if that’s all you’ve got), milk, sugar, vanilla extract, and a pinch of sea salt. Simple stuff, but when it all comes together? Magic.

How to make snow with 3 ingredients?

Want it real stripped down? Go for milk, sugar, and snow. That’s it. You can skip the vanilla and salt, though I recommend at least the vanilla if you’ve got it!

Is it safe to make ice cream out of snow?

Totally safe—as long as you’re using clean, freshly fallen snow. I always say go for the top layer, away from roads or places with pollution. Or, just make shaved ice indoors if you’re unsure.

How do you make Paula Deen’s snow cream?

Paula’s version usually calls for condensed milk, which makes it extra rich and creamy. Swap your regular milk for sweetened condensed milk in this recipe and you’re good to go!

Bowl of snow ice cream with condensed milk
Fresh snow ice cream finished with a drizzle of condensed milk
Print

Snow Ice Cream Recipe

Bowl of snow ice cream with condensed milk
Print Recipe
Print Recipe

5 Stars 4 Stars 3 Stars 2 Stars 1 Star

No reviews

This 5-minute snow ice cream recipe is a sweet, nostalgic winter treat made with fresh snow, milk, sugar, and vanilla — easy, quick, and perfect for snow days!

  • Author: Michael Carter
  • Prep Time: 5 minutes
  • Cook Time: 0 minutes
  • Total Time: 5 minutes
  • Yield: About 2–4 servings 1x
  • Category: Dessert
  • Method: Stirred
  • Cuisine: American

Ingredients

Scale

1 cup milk (any kind – dairy or plant-based)

1/3 cup granulated white sugar

1 teaspoon vanilla extract

1 pinch fine sea salt

About 8 cups of fresh, clean snow (or shaved ice)

Instructions

  1. In a medium mixing bowl, whisk together the milk, sugar, vanilla, and salt until fully combined.
  2. Head outside and scoop up that fresh, fluffy snow — around 8 cups’ worth. (Or prep your shaved ice indoors.)
  3. Gradually stir the snow into the milk mixture, folding gently until it reaches a soft-serve consistency.
  4. Serve immediately with your favorite toppings like sprinkles, chocolate chips, or a drizzle of condensed milk.

Notes

  • Freeze the snow while you prep to prevent it from melting too fast.
  • Adjust the sugar depending on your milk choice — sweetened milk may need less sugar.
  • Best enjoyed right after making — snow ice cream doesn’t store well in the freezer.
  • Try variations like cocoa powder, crushed cookies, or chopped nuts for fun twists.

Nutrition

  • Serving Size: 1 bowl
  • Calories: 130kcal
  • Sugar: 18g
  • Sodium: 100mg
  • Fat: 4g
  • Saturated Fat: 2g
  • Unsaturated Fat: 1g
  • Carbohydrates: 22g
  • Protein: 2g
  • Cholesterol: 10mg

Did you make this recipe?

Share a photo and tag us — we can’t wait to see what you’ve made!

Filed Under: Blog

Pistachio Cream Recipe

July 25, 2025

Ok, so let me tell you something real quick—this pistachio cream recipe? It’s got a grip on me. Like, full-on crave-it-on-toast-at-midnight kinda grip. I first tasted something like this when I was road-tripping through Italy back in my early twenties, hunting down all the good stuff the nonnas don’t put in cookbooks. I remember this tiny bakery near Bronte, Sicily—a family-run spot where the youngest son, maybe 14, handed me a warm pastry filled with this impossibly green, sweet-salty pistachio filling. Changed my whole idea of what a nut spread could be.

If you’ve ever fallen head over heels for something simple yet bold—like my Caramel Popcorn or these old-school Fried Apples—then you know that flavor has a way of tugging at your memory and taste buds all at once.

Homemade savory pistachio cream spread on rustic toast
A warm slice of sourdough with homemade pistachio cream, ready to devour

Now, here in sunny California, I like to think I’ve finally nailed down my own version. It’s creamy, rich, and just slightly salty—a flavor that plays well in both sweet and savory dishes. That little salty note? That’s the move, trust me.

And guess what? You don’t need white chocolate, heavy cream, or even a fancy jar from the import aisle. This is a no-fuss, no-milk (if you want it that way), no-white-chocolate take on a pistachio cream recipe that hits all the notes.

Peeled raw pistachios ready for pistachio cream
Prepping raw pistachios for a smooth, creamy spread

For the nuts, I usually stick with California-grown pistachios. They’re easy to find and still make a wonderfully flavored cream. But if you stumble upon some Turkish or Sicilian ones—snag ‘em. They’re smaller, a bit more vivid green, and they blend like a dream.

Now, here’s where things get a little fiddly but totally worth it: peeling those pistachios. I used to skip this part when I was lazy (I mean, we’re all human), but that gritty texture? Nope, not the vibe. Boiling them for a few minutes, then rubbing off the skins in a towel makes all the difference. It’s a little extra step, but if you’re gonna make this cream, might as well go all in.

Pistachio cream drizzled over vanilla ice cream
Creamy pistachio spread takes your dessert game up a notch

If you’re looking to make a pistachio cream recipe without white chocolate, you can absolutely skip it here. Try using a bit of maple syrup or a splash of almond oil instead. I’ve even made this without any milk—just a drizzle of water and oil to get the right texture.

As for the texture, blend, blend, blend. Scrape the sides, be patient, and don’t be afraid to pulse a little longer. It should feel thick but spoonable—like the love child of nut butter and ganache. And once it’s done? Oh baby. Stir it into yogurt, spoon it over banana pancakes, tuck it into crepes, or just go caveman and eat it with your fingers. I won’t judge.

And hey—if you spot that Costco pistachio cream everyone’s raving about, this recipe’s your homemade answer. Less sugar, more pistachio punch, and no funky preservatives.

Homemade pistachio cream in jar with baking tools
Keep a jar of this homemade pistachio cream in your fridge for quick sweet or savory bites

FAQs

How do you make pistachio cream?

Boil and peel raw pistachios, then blend them up with melted white chocolate, a touch of milk or cream, butter, sugar, and a pinch of salt until smooth. You can swap or skip ingredients to fit your taste.

What would I use pistachio cream for?

Oh boy, where do I start? Toast, ice cream, pancakes, inside muffins, layered in cakes, stuffed in crepes, swirled into yogurt, or just spooned into your mouth at 11pm. It’s all fair game.

How to use Costco pistachio cream?

Treat it like Nutella—slather it on stuff! Or, try mixing it into frostings or fillings. But honestly? My homemade version tastes cleaner and more pistachio-forward.

What is a pistachio cream?

It’s basically a sweet spread made from pistachios, often blended with white chocolate and dairy. Kind of like a green, nutty cousin to Nutella. Not to be confused with pistachio butter or paste—those are thicker and less sweet.

Creamy pistachio spread in bowl with knife and toast
Smooth, decadent homemade pistachio cream ready to enjoy
Print

Pistachio Cream Recipe

Creamy pistachio spread in bowl with knife and toast
Print Recipe
Print Recipe

5 Stars 4 Stars 3 Stars 2 Stars 1 Star

No reviews

A smooth, sweet-savory homemade pistachio cream made with real raw pistachios, white chocolate, and just a touch of salt. Perfect for spreading, drizzling, or sneaking by the spoonful.

  • Author: Michael Carter
  • Prep Time: 20 minutes
  • Cook Time: 4 minutes
  • Total Time: 24 minutes
  • Yield: 1.5 cups 1x
  • Category: Condiment, Dessert, Spread
  • Method: Blended
  • Cuisine: Italian-American

Ingredients

Scale

1 1/4 cups raw, unsalted pistachios (shelled)

2 tablespoons unsalted butter

3/4 cup whole milk or cream, divided (or substitute almond milk or water)

4 oz good white chocolate, chopped (about 1 cup)

2 tablespoons confectioner’s sugar

1/4 teaspoon kosher salt (Diamond Crystal)

Instructions

  1. Boil pistachios for 3 minutes, then drain.
  2. Place hot pistachios in a clean kitchen towel and rub to remove skins.
  3. Make sure pistachios are fully dry.
  4. In a small bowl, heat butter with 1/4 cup of milk in the microwave until warm. Stir in white chocolate until melted.
  5. Add pistachios, sugar, and salt to a blender.
  6. Scrape in melted chocolate mixture.
  7. Blend until a paste forms.
  8. Slowly add more milk until desired creamy texture is reached.
  9. Blend on high for 30-60 seconds, scraping sides as needed.
  10. Store in airtight container in the fridge for up to 2 weeks.

Notes

  • Want a version with zero dairy? Swap the milk and butter with almond milk and coconut oil.
  • The trick to smooth texture? Patience. Let the blender do its magic.
  • Don’t skip peeling the pistachios. It makes all the difference.
  • Taste as you go—every batch of nuts is different.
  • It thickens in the fridge, so don’t worry if it seems a bit loose when warm.

Nutrition

  • Serving Size: 1 heaped cup (300g)
  • Calories: 1752kcal
  • Sugar: 88g
  • Sodium: 184mg
  • Fat: 130g
  • Saturated Fat: 47g
  • Unsaturated Fat: 74g
  • Trans Fat: 1g
  • Carbohydrates: 120g
  • Fiber: 15g
  • Protein: 44g
  • Cholesterol: 105mg

Did you make this recipe?

Share a photo and tag us — we can’t wait to see what you’ve made!

Filed Under: Blog

Fried Apples Recipe

July 15, 2025

There’s something about the smell of apples sizzling in butter that pulls me right back to my childhood kitchen in Philly. Picture it: a chilly Saturday morning, windows fogged up from the warmth inside, and my mom humming along to the old radio in the corner while she worked a cast iron skillet like it was second nature. That aroma—sweet, buttery, with a good dose of cinnamon—was our unofficial wake-up call. We’d tumble out of bed like it was Christmas morning, knowing full well fried apples were on the stove.

Now, this fried apples recipe isn’t just food—it’s a memory. And if you’re here lookin’ for something that feels like a hug on a plate, this might be the thing. What I love most about this dish is how simple it is—just apples, butter, cinnamon, and sugar. But somehow, it always feels like more than the sum of its parts. It’s a bit like magic that way.

Southern fried apples cooking in a skillet with cinnamon and butter
Fried apples bubbling in butter and cinnamon — a warm Southern favorite

This one reminds me a little of an old fashioned fried apple recipe you’d find scribbled on an index card tucked in grandma’s cookbook. It’s not fancy, but boy, does it bring the comfort. And if you’re like me, always on the lookout for a fried apple recipe with brown sugar? Just sub out half the white sugar for brown—you’ll get that deep, almost caramel-like flavor that takes it up a notch.

We’d serve this alongside pancakes or over oatmeal, but let me tell ya, it’s also fantastic piled high on pork chops or spooned warm over a scoop of vanilla ice cream. And if you’re trying to keep things on the healthy side? Well, you can go light on the sugar, use coconut oil instead of butter, or even try honey as a swap.

Fried apples served over pancakes on a breakfast table
Southern fried apples make the perfect pancake topping

Every time I make these, I think of how my Nonna used to keep things so simple in the kitchen—but man, her food could stop you in your tracks. She didn’t use measurements, just instinct and a whole lotta love. That’s what I hope you feel when you make this simple fried apple recipe—like someone’s right there with you, stirring the pan, telling stories about “back in the day.”

And hey, if you’re more into the whole apple crisp recipe vibe? Try adding a little oatmeal crumble on top and baking it for a few minutes in the oven. Instant shortcut crisp.

Apple crisp made with fried apples and crumble topping
Turn your fried apples into a quick apple crisp with oatmeal topping

So whether you’re lookin’ for a fried apples recipe healthy spin or just tryin’ to bring a little Southern warmth to your kitchen, this one’s for you. Let the smell fill your home, and maybe—just maybe—it’ll take you back to a simpler time, too.

FAQs

How do you do fried apples?

Super easy—just melt some butter, stir in sugar and cinnamon, then toss in sliced apples and cook until they’re tender. It’s one of those no-fuss recipes that always hits.

What apples are best for frying?

Granny Smith is my go-to—nice and tart, holds its shape. But Honeycrisp or Fuji work great too if you want something sweeter.

Are fried apples healthy?

They can be, depending how you tweak it. Use less sugar, try coconut oil instead of butter, and skip the ice cream on top (or don’t—we’re not judging here).

Can you caramelize apples without sugar?

You bet. Apples have natural sugars, so if you cook ‘em low and slow with just a bit of water and cinnamon, they’ll soften and sweeten all on their own. Add a splash of apple juice if you want more flavor.

Close-up of a bowl of Southern-style fried apples
A bowl of warm, tender fried apples glazed with cinnamon and butter
Print

Fried Apples Recipe

Close-up of a bowl of Southern-style fried apples
Print Recipe
Print Recipe

5 Stars 4 Stars 3 Stars 2 Stars 1 Star

No reviews

A simple and sweet Southern-style fried apples recipe made with cinnamon, sugar, and butter. Perfect for breakfast, dessert, or spooned over pancakes.

  • Author: Michael Carter
  • Prep Time: 10 minutes
  • Cook Time: 10 minutes
  • Total Time: 20 minutes
  • Yield: 4 servings 1x
  • Category: Dessert / Side
  • Method: Stovetop
  • Cuisine: Southern American

Ingredients

Scale

½ cup butter

½ cup white sugar (or swap half for brown sugar for a deeper flavor)

2 tablespoons ground cinnamon (or less, to taste)

4 Granny Smith apples – peeled, cored, and sliced

Instructions

  1. In a large skillet, melt the butter over medium heat.
  2. Stir in the sugar and cinnamon until it all melts together into a sweet, cinnamony sauce.
  3. Toss in the sliced apples and stir to coat them well.
  4. Cook for 5 to 8 minutes, stirring occasionally, until the apples are soft but still hold their shape.
  5. Serve warm, and if you’re feelin’ extra cozy, add a scoop of vanilla ice cream or spoon it over pancakes.

Notes

  • Wanna lighten it up? Use coconut oil and a drizzle of maple syrup instead of butter and sugar.
  • If you’ve got leftovers, pop ‘em in the fridge and reheat in a skillet (or the microwave, no shame in that).
  • Toss in a pinch of nutmeg for a little holiday flair.
  • Let me know if you make it—drop a comment, leave a star, or tag me in your photos. I *love* seeing your kitchen stories.

Nutrition

  • Serving Size: 1 serving
  • Calories: 369kcal
  • Sugar: 39g
  • Sodium: 165mg
  • Fat: 23g
  • Saturated Fat: 15g
  • Unsaturated Fat: 6g
  • Carbohydrates: 45g
  • Fiber: 5g
  • Protein: 1g
  • Cholesterol: 61mg

Did you make this recipe?

Share a photo and tag us — we can’t wait to see what you’ve made!

Filed Under: Blog

Caramel Popcorn Recipe

July 14, 2025

Alright, so picture this: it’s a chilly Sunday afternoon in South Philly. The Eagles game is humming low on the TV, Mom’s got Sinatra playing softly in the kitchen, and I’m sitting cross-legged on the linoleum floor, hands sticky with caramel, because guess what? We were making caramel popcorn. And not just any caramel popcorn – the kind that gets stuck in your molars in the best way, the kind that makes the whole house smell like toasted sugar and buttery hugs. That’s the kind of memory this caramel popcorn recipe brings back every single time I make it.

This recipe’s been passed around more than a casserole at a church potluck. It’s old-school, straight-up, no fancy tricks—just buttery, golden caramel clinging to every fluffy popped kernel like it was born to be there. It’s the one snack that showed up at every sleepover, movie night, and holiday gift tin growing up.

classic caramel popcorn recipe on wooden counter
The comfort of homemade caramel popcorn in a cozy kitchen

You know what makes this caramel popcorn recipe even more lovable? It’s easy. I mean, actually easy. Like, you-don’t-need-a-candy-thermometer easy. And if you’re the kinda person who’s trying to skip the corn syrup—hey, I got you. I’ve been testing a caramel popcorn recipe without corn syrup, and let me tell you, it still gets that deep, almost-toffee flavor and glossy finish you want.

Sometimes I just use three things—3 ingredient caramel popcorn, yep, it’s a thing—and it comes out so shockingly good that even my buddies from culinary school don’t believe I didn’t spend hours in a sugar-laced trance over the stove.

adding caramel sauce to popcorn
The moment caramel hits fresh popcorn—magic in the making

The texture is key here. You bake it low and slow so that caramel really sets and hugs the popcorn, getting that perfect crunch—not tooth-breaking, but crisp in a way that holds up even after a week in a tin (if it lasts that long).

I sometimes throw in a dash more salt for that salty-sweet fix. My Nonna used to sneak in chopped roasted peanuts for a little extra chew and crunch. That’s totally optional, but boy, it does give it a bit of Cracker Jack nostalgia.

best caramel popcorn with peanuts in a holiday tin
Sweet, crunchy, salty – the best caramel popcorn ever

And if you’re wondering if this is the best caramel popcorn recipe ever, well—I can’t speak for Gordon Ramsay (though now I’m curious…), but I can promise you it’s got the love, the crunch, and the golden hug that makes it feel like home.

old fashioned caramel popcorn shared with family
Caramel popcorn – best shared with the ones you love

FAQs

How to make caramel popcorn?

Pretty simple, really. Pop the corn, melt the butter and sugar into caramel, pour it on while mixing fast, then bake low and slow to crisp it up.

How do you add caramel sauce to popcorn?

You wanna pour it in a thin stream while stirring constantly. That way, every piece gets kissed by caramel. Don’t dump it all at once!

How does Gordon Ramsay make caramel popcorn?

No clue, but I imagine he yells at it until it crisps up perfectly. All jokes aside, he likely does a more fussy version with thermometers and technique. Mine? Pure comfort food.

Why put baking soda in caramel popcorn?

Ah, good question! Baking soda helps the caramel foam up—makes it airy and easier to coat the popcorn evenly. It’s kinda science-y, but trust me, it works.

finished homemade caramel popcorn in bowl
Fresh from the oven—crisp, buttery, caramel popcorn
Print

Caramel Popcorn Recipe

finished homemade caramel popcorn in bowl
Print Recipe
Print Recipe

5 Stars 4 Stars 3 Stars 2 Stars 1 Star

No reviews

This caramel popcorn recipe is old-fashioned, buttery, and bakes to a crisp, sweet crunch—just like Mom used to make on cozy Philly afternoons.

  • Author: Michael Carter
  • Prep Time: 15 mins
  • Cook Time: 1 hr
  • Total Time: 1 hr 15 mins
  • Yield: 5 quarts 1x
  • Category: Snack
  • Method: Baked
  • Cuisine: American

Ingredients

Scale

5 quarts popped popcorn

1 cup butter

2 cups brown sugar

1/2 cup corn syrup (or substitute with honey for no corn syrup version)

1 teaspoon salt

1 teaspoon vanilla extract

1/2 teaspoon baking soda

Instructions

  1. Preheat oven to 250°F (120°C). Place popcorn in a very large mixing bowl.
  2. In a saucepan over medium heat, melt butter. Stir in brown sugar, corn syrup (or honey), and salt. Bring to a boil, stirring constantly.
  3. Let boil without stirring for 4 minutes.
  4. Remove from heat, stir in vanilla and baking soda.
  5. Immediately pour the caramel mixture over popcorn while stirring constantly.
  6. Divide the coated popcorn between two large shallow baking pans.
  7. Bake for 1 hour, stirring every 15 minutes.
  8. Remove from oven and let cool completely before breaking into pieces.

Notes

  • If you’re after that chewy bite, bake for a little less time.
  • Want crunch? Stick with the full hour.
  • You can add roasted nuts, a sprinkle of cinnamon, or even a tiny dash of cayenne for a sweet heat twist.
  • Store in airtight tins for up to a week—if it lasts that long!

Nutrition

  • Serving Size: 1 cup
  • Calories: 253kcal
  • Sugar: 24g
  • Sodium: 340mg
  • Fat: 14g
  • Saturated Fat: 7g
  • Carbohydrates: 33g
  • Fiber: 1g
  • Protein: 1g
  • Cholesterol: 24mg

Did you make this recipe?

Share a photo and tag us — we can’t wait to see what you’ve made!

Filed Under: Blog

Strawberry Margarita Recipe

July 13, 2025

You ever take that first sip of something so ice-cold, tangy-sweet, and bright that your whole body just kinda sighs in relief? That, my friend, is exactly what this strawberry margarita recipe does to me—every single time.

I remember the first time I tasted one, too. I was back in Philly, rooftop party, midsummer, sweating through my t-shirt like everyone else. My buddy Rico handed me a glass that looked like something out of a postcard—bright red, salted rim, a lime wedge hangin’ on the side like it had nowhere else to be. I took a sip, and boom. Fireworks. Like, actual fireworks—’cause it was the 4th of July.

Now, out here in California, with strawberries practically throwin’ themselves off the vine this time of year, I figured it was time to share the version I make at home. And lemme tell you, this one’s as easy as tossing everything into a blender and hittin’ “go.”

Looking for other refreshing ideas? You might also like my Herbal Cordial Recipe, this Natural Zepbound Recipe, or a vibrant glass of Chukandar Juice.

You won’t believe how simple this strawberry margarita recipe is. Whether you’re throwin’ a backyard BBQ, pool hang, or just want a treat on a Tuesday, this is the drink that delivers.

Strawberry margarita mix in blender on kitchen counter
A freshly blended strawberry margarita ready to pour

I usually keep frozen strawberries in the freezer for smoothies, but honestly, their real purpose? Margaritas. Frozen berries make the drink nice and thick without watering it down, which is kinda perfect when you’re avoiding the slushie-machine vibe but still want that frosty chill.

You can totally go fresh if that’s what you’ve got on hand—just maybe pour the whole thing over rocks instead of blending, and boom, now you’ve got your strawberry margarita on the rocks recipe too.

And for my folks who don’t own a blender or don’t feel like dragging it out, don’t sweat it. Muddle some berries, shake it all up with ice, strain it, and you’ve got a solid strawberry margarita recipe no blender style. I’ve done it on the fly more times than I can count.

Garnishing strawberry margaritas with lime and berries
Adding the final touch: lime wedges and fresh strawberries

Tequila? Go with something good but not too precious. I usually grab a Blanco or Reposado—not just because it sounds fancy but ’cause it mixes clean. And if you’re using strawberry syrup instead of whole berries? That totally works for a strawberry margarita recipe with strawberry syrup. Sweet, fast, and still gets that punchy berry flavor.

One more thing—this easy strawberry margarita recipe is built to flex. Want it sweeter? Add a touch more honey. Tart? Squeeze in more lime. Boozier? Well, you know what to do.

Summer table with strawberry margaritas and snacks
The perfect summer setup with strawberry margaritas and snacks

FAQs

What do I need for strawberry margaritas?

You need frozen strawberries, tequila, lime juice, orange liqueur (like Cointreau), and something sweet like honey or simple syrup. Salt and lime wedges are a bonus for the rim and garnish.

What is the 321 rule for margaritas?

That’s 3 parts tequila, 2 parts triple sec (or orange liqueur), and 1 part lime juice. It’s a great base ratio, especially if you’re makin’ classic margaritas. I like to tweak it a bit for fruity ones like this.

What is the best tequila to use for strawberry margaritas?

Blanco tequila is clean and classic, but Reposado has a lil’ more flavor if you’re into that mellow oakiness. Skip anything too aged or pricey—you want the tequila to play nice with the fruit, not fight it.

What are the basic ingredients in a margarita?

Tequila, lime juice, and orange liqueur. That’s your base. After that, it’s a choose-your-own-adventure depending on flavors and what you’ve got around.

Frozen strawberry margarita in a salt-rimmed glass
The finished frozen strawberry margarita, ready to sip
Print

Strawberry Margarita Recipe

Frozen strawberry margarita in a salt-rimmed glass
Print Recipe
Print Recipe

5 Stars 4 Stars 3 Stars 2 Stars 1 Star

No reviews

A frosty, vibrant strawberry margarita that’s sweet, tangy, and super easy to whip up in just 5 minutes using frozen strawberries and fresh lime juice. Perfect for summer nights, BBQs, or taco Tuesdays!

  • Author: Michael Carter
  • Prep Time: 5 minutes
  • Cook Time: 0 minutes
  • Total Time: 5 minutes
  • Yield: 4 servings 1x
  • Category: Drink
  • Method: Blended
  • Cuisine: Mexican-American
  • Diet: Gluten Free

Ingredients

Scale

1 pound frozen whole strawberries

¾ cup tequila (Blanco or Reposado)

½ cup fresh lime juice

¼ cup orange liqueur (like Cointreau)

⅓ cup honey or preferred sweetener (adjust to taste)

Margarita salt, for rim (optional)

Lime wedges and whole strawberries, for garnish

Instructions

  1. Run a lime wedge around the outer rim of each glass, then roll in margarita salt. Set aside.
  2. In a blender, combine frozen strawberries, tequila, lime juice, orange liqueur, and sweetener.
  3. Blend until smooth. Taste and adjust sweetness or alcohol if needed.
  4. Pour into glasses and garnish with lime and strawberry. Serve immediately!

Notes

  • If you’re using fresh strawberries, add 1 to 2 cups of ice or serve over ice for a strawberry margarita on the rocks.
  • No blender? Muddle the berries, shake with other ingredients and ice, then strain into a glass.
  • For a shortcut, use strawberry syrup instead of fruit. It won’t be frosty but still tastes great.
  • Want it thicker? Add ice. Want it lighter? Use sparkling water to top it off for a spritz-style version.

Nutrition

  • Serving Size: 1 drink
  • Calories: 314 kcal
  • Sugar: 34g
  • Sodium: 5mg
  • Fat: 1g
  • Saturated Fat: 1g
  • Carbohydrates: 39g
  • Fiber: 2g
  • Protein: 1g

Did you make this recipe?

Share a photo and tag us — we can’t wait to see what you’ve made!

Filed Under: Drinks

Bisquick Pancake Recipe

July 13, 2025

Let me tell you something—there are mornings that just call for the smell of hot batter hitting a sizzling pan, ya know? And for me, that feeling—the kind that wraps around you like a thick flannel on a brisk Saturday—takes me right back to my mom’s tiny kitchen in South Philly. She wasn’t fancy about breakfast, but boy, could she make a mean pancake. And if she ever had Bisquick in the cupboard? Oh, game on.

That classic Bisquick pancake recipe has kinda become my go-to when I want something comforting without the whole ordeal. It’s quick, it’s simple, and it hits the spot just right. You only need four ingredients and about 20 minutes, which is barely enough time to finish your first cup of coffee. That little yellow box really earns its keep, and honestly, I’ve come to believe there’s some quiet magic tucked inside that mix.

steaming stack of Bisquick pancakes on griddle with syrup
Hot pancakes on the griddle, golden and ready

Honestly, pancakes with Bisquick pancake mix ingredients like eggs, milk, and oil couldn’t be more unfussy. And guess what? You can even make a Bisquick pancake recipe with water if you’re outta milk—just swap it in, and while it might be a little less rich, it still works like a charm.

What I love most? These flapjacks are blank slates. Add bananas, toss in blueberries, grate some dark chocolate over the top—whatever suits your vibe that day.

pancake toppings with Bisquick batter
Bisquick batter waiting for the perfect toppings

The Bisquick pancake mix instructions are so simple, my nephew can make ’em. (And he once put the cereal box in the fridge, so… you get the idea.) One of my favorite tips? Use a quarter-cup measure to pour your batter and don’t flip those beauties until you see bubbles on the top. That’s when the real pancake magic happens.

pancake cooking on griddle with bubbles
Wait for those bubbles before the flip

These days, I still make this exact pancake recipe on weekends when I want to slow down. I even make extra and freeze them between waxed paper for weekday mornings. Reheat, drizzle some peanut butter and syrup on top, and you’ve got yourself a hug in food form.

frozen Bisquick pancakes prepped for weekday breakfast
Ready-to-reheat Bisquick pancakes for the week

FAQs

What ingredients do you need for Bisquick pancakes?

You just need 2 cups of Bisquick mix, 1 cup milk, 2 eggs, and 2 tablespoons of oil. That’s it. Doesn’t get much easier.

Is Bisquick pancake mix just add water?

Some boxed mixes are, but this one asks for eggs and milk. That said, yeah, you can use just water if needed—they’ll be thinner and less rich, but still totally edible.

How to make easy pancakes with 3 ingredients?

Mix Bisquick, milk (or water), and eggs. Skip the oil if you grease the griddle well. It’s still tasty, especially if you’re in a rush.

Why are my Bisquick pancakes not fluffy?

You might be flipping too soon or too often. Let those bubbles form first and only flip once. Also, check your batter—too runny and it won’t puff.

stacked Bisquick pancakes with syrup and butter
The final stack: golden, syrupy, and ready to devour
Print

Bisquick Pancake Recipe

stacked Bisquick pancakes with syrup and butter
Print Recipe
Print Recipe

5 Stars 4 Stars 3 Stars 2 Stars 1 Star

No reviews

These classic Bisquick pancakes are fluffy, golden, and comforting with just four ingredients and about 20 minutes start to finish. Perfect for lazy mornings or meal prepping ahead.

  • Author: Michael Carter
  • Prep Time: 15 min
  • Cook Time: 5 min
  • Total Time: 20 min
  • Yield: 14 pancakes 1x
  • Category: Breakfast
  • Method: Griddle
  • Cuisine: American

Ingredients

Scale

2 cups Original Bisquick™ Baking Mix

1 cup milk

2 tablespoons vegetable oil

2 eggs

Instructions

  1. Grease or spray a griddle or skillet. Heat over medium-high or to 375°F. Surface is ready when drops of water dance.
  2. Stir all ingredients until combined.
  3. Pour slightly less than 1/4 cup batter onto hot surface.
  4. Cook 1 minute 30 seconds or until edges are dry.
  5. Flip and cook another 1 minute 30 seconds or until golden brown.

Notes

  • Want thinner pancakes? Add a splash more milk, up to 1 1/3 cups.
  • Use a cast-iron skillet for the best browning and crisp edges.
  • Only flip once! Trust me, flipping back and forth ruins the texture.
  • To keep pancakes warm, line a baking sheet with paper towels and hold them in a 200°F oven.
  • Freeze extras between waxed paper, reheat in the microwave, and enjoy any day of the week.

Nutrition

  • Serving Size: 1 pancake
  • Calories: 100kcal
  • Sugar: 2g
  • Sodium: 180mg
  • Fat: 3.5g
  • Saturated Fat: 1g
  • Unsaturated Fat: 2.5g
  • Carbohydrates: 14g
  • Protein: 2g
  • Cholesterol: 30mg

Did you make this recipe?

Share a photo and tag us — we can’t wait to see what you’ve made!

Filed Under: Blog

Chicken Cutlet Recipe

July 11, 2025

Let me tell you somethin’ — where I grew up in South Philly, if you didn’t have a good chicken cutlet recipe passed down from your mom, your aunt, or your Nonna, you were probably eatin’ too many hoagies and not enough Sunday dinners. These crispy Italian chicken cutlets? Yeah, they’re more than food. They’re memories on a plate.

I remember bein’ ten, standin’ on a wobbly stool in my Ma’s kitchen, tryin’ not to burn my fingers as I helped press breadcrumbs onto thin little chicken pieces. She’d always hum Sinatra while cookin’, and you just knew dinner was gonna be somethin’ special when the olive oil hit the pan and that sizzle filled the house. That smell? It’s locked into my brain forever — golden, garlicky, warm… kinda like a hug for your nose.

Fast forward a few years — culinary school, restaurant gigs, some burned pans, some applause — and I still come back to this dish. It’s one of those simple chicken cutlet recipes that just works every time. If someone ever asked me what’s the best chicken cutlet recipe I know? This is the one. Hands down.

For other comforting classics, check out my Bone Broth Recipe or indulge in the creamy goodness of this Crack Chicken Recipe.

frying chicken cutlets in olive oil
Chicken cutlets frying until perfectly golden

I’m tellin’ you, what makes this easy chicken cutlet recipe in the oven or stove-top so reliable is in the little things. Pound your chicken good and thin. Don’t rush the breading — flour, then egg, then breadcrumbs. Not the other way around. And don’t skimp on the cheese in that egg bath — trust me, it makes all the difference.

chicken cutlet breading station
Prepping chicken cutlets with flour, egg, and breadcrumb setup

Sometimes folks ask if these are healthy chicken cutlet recipes — and hey, I get it. You wanna keep things a bit lighter. I’ve done these in the oven before, too. Just lay ’em on a wire rack over a sheet pan, give ’em a spray of oil, and bake until crisp. Not quite the same sizzle, but still real tasty.

And let’s not forget the sauce game. You want chicken cutlet recipes with sauce? Marinara’s the classic move, especially if you’re turnin’ it into a sandwich. But one of my all-time faves? A lemony arugula salad plopped right on top. Fresh, zippy, and kinda feels like you’re eatin’ dinner in some little trattoria by the shore.

chicken cutlet with arugula and lemon
Italian chicken cutlets served with arugula and lemon

I like keepin’ a batch of these on hand, too. Make extras, pop ‘em in the fridge, and they’re just as good cold. And let’s be honest — late night, one of these straight from the fridge with a dab of hot sauce? Forget it. Midnight snack dreams.

leftover cold chicken cutlets in fridge
Late-night leftover chicken cutlets from the fridge

FAQs

How to properly cook chicken cutlets?

Cook ‘em in a hot skillet with enough olive oil to get things sizzling. Don’t crowd the pan — give each piece space. Flip once the bottom’s golden brown, usually about 3–4 minutes per side.

What’s the secret to flavorful cutlets?

Season every step: the flour, the egg, the breadcrumbs, and the chicken. And add grated cheese to your egg mix — that’s Nonna-level wisdom right there.

Do you put egg or flour in chicken cutlets first?

Always start with the flour, then the egg, then the breadcrumbs. That’s the holy order. Flour helps the egg stick, the egg helps the crumbs stick.

What to make out of chicken cutlets?

Oof, where to start? Sandwiches, salads, cutlet parm, you name it. They’re like the Swiss army knife of the kitchen — crisp, meaty, and ready for anything.

platter of Italian chicken cutlets
Crispy Italian chicken cutlets fresh from the pan
Print

Chicken Cutlet Recipe

platter of Italian chicken cutlets
Print Recipe
Print Recipe

5 Stars 4 Stars 3 Stars 2 Stars 1 Star

No reviews

A classic Italian-American chicken cutlet recipe made with seasoned breadcrumbs, grated cheese, and pan-fried in olive oil for an extra crispy finish.

  • Author: Michael Carter
  • Prep Time: 30 minutes
  • Cook Time: 15 minutes
  • Total Time: 45 minutes
  • Yield: 6 servings 1x
  • Category: Main Course
  • Method: Pan-Fried
  • Cuisine: Italian-American

Ingredients

Scale

3 cups homemade or panko breadcrumbs

3 cloves garlic, finely minced

2 tablespoons fresh parsley, minced

1/2 tsp dried Italian seasoning (optional)

1 1/4 cups grated Pecorino Romano or Parmesan, divided

Kosher salt and black pepper, to taste

3 large eggs

1 tablespoon water

1 cup all-purpose flour

2 lbs boneless skinless chicken breasts, thinly sliced

Extra virgin olive oil, for frying

Instructions

  1. In a shallow bowl, combine breadcrumbs, garlic, parsley, Italian seasoning, and 3/4 cup cheese. Season with salt and pepper.
  2. In a second bowl, whisk eggs with remaining cheese, salt, pepper, and water.
  3. In a third bowl, mix flour with salt and pepper.
  4. Pound chicken slices to about 1/2-inch thickness using a mallet and season both sides.
  5. Bread the chicken in this order: flour, egg, breadcrumbs. Press well to coat.
  6. Heat oil in a large skillet over medium-high heat. Fry chicken in batches until golden brown on both sides.
  7. Drain on a wire rack and serve hot with lemon wedges or your favorite sauce.

Notes

  • Let the breaded chicken rest 30 minutes before frying — helps that crispy shell stick.
  • Use a fork instead of tongs while breading and frying. Trust me.
  • If you’re baking instead of frying, spray with oil and bake at 425°F for 20–25 minutes.
  • Store leftovers in the fridge for up to 5 days or freeze up to 3 months.
  • Try with arugula salad or make a killer cutlet sandwich with provolone and roasted peppers.

Nutrition

  • Serving Size: 1 cutlet
  • Calories: 489kcal
  • Sugar: 2g
  • Sodium: 792mg
  • Fat: 14g
  • Saturated Fat: 5g
  • Unsaturated Fat: 6g
  • Trans Fat: 0.03g
  • Carbohydrates: 41g
  • Fiber: 2g
  • Protein: 47g
  • Cholesterol: 197mg

Did you make this recipe?

Share a photo and tag us — we can’t wait to see what you’ve made!

Filed Under: Blog

Crack Chicken Recipe

July 10, 2025

Let me tell you somethin’—the first time I tasted this crack chicken recipe, I was over at my buddy Joey’s place, and his wife served it on toasted buns like some sort of love letter to comfort food. One bite in and I nearly dropped the plate. Creamy, cheesy, smoky, and packed with that ranch kick we all secretly crave—it’s the kind of dish that makes your eyes close for a second longer than necessary. Yeah, it’s that kind of good. If you’re looking for something warm to sip while this simmers, I highly recommend my bone broth recipe—super simple and incredibly soothing.

crack chicken ingredients laid out in a home kitchen
Everything you need for my favorite crack chicken recipe—laid out and ready to work their magic

Now, before we get too ahead of ourselves, I gotta say: there’s a reason folks call it crack chicken. I didn’t name it, alright? But I get it. It’s nothin’ fancy—just simple, hearty stuff that gets your taste buds dancin’ and your brain goin’ “wait, why is this so good?” It’s one of those dishes that practically hugs you from the inside. And believe me, as a kid growin’ up in a South Philly row home where dinner was the most sacred part of the day, that kinda food meant everything.

I like to keep it old-school and use chicken thighs for this one. Don’t get me wrong—breasts are fine, but thighs? They’ve got that juicy, rich flavor that stands up to the cream cheese and cheddar like a champ. We’re talkin’ full flavor, no dry bites, just the way Nonna would’ve liked it.

chicken in slow cooker with cream cheese and ranch
Starting off this baked crack chicken recipe in the slow cooker—just layer, cover, and wait for the magic

Now, if you’re lookin’ for an easy crack chicken recipe, it doesn’t get much simpler than this. Toss everything into your slow cooker and let it do its thing while you go about your day. The smell alone might stop your mailman in his tracks.

When it’s all cooked through—about 7 hours on low—you’ll shred that chicken right in the pot. No need for fancy tools. I just grab two forks and go to town. Then in goes the bacon (and not the wimpy kind either), followed by a big ol’ handful of shredded cheddar. Let it melt. Sprinkle on green onions if you’re feelin’ fancy.

cheesy crack chicken in slow cooker with bacon
All shredded up and cheesy—my favorite stage of this easy crack chicken recipe

And hey, you got options. Serve it over rice, stuff it into baked potatoes, or pile it high on a toasted roll. I’ve even scooped it up with crackers like a dip during game night. It’s one of those original crack chicken recipes that lets you do your own thing.

plated crack chicken over rice
Crack chicken served hot over rice—pure comfort on a plate

FAQs

What are the ingredients for crack chicken?

The basics? Chicken thighs, ranch seasoning mix, cream cheese, cooked bacon, cheddar cheese, and green onions. That’s your flavor-packed dream team right there.

Why is it called crack chicken?Honestly?

Probably ‘cause it’s so dang addictive. That creamy, savory combo hits all the right spots. People try it once and go, “Wait, I need more of that.”

Do you put chicken broth in crack chicken?

You can, but I usually don’t. The chicken releases enough juices during the slow cooking, and the cream cheese adds all the creaminess you need.

What are the ingredients in crack chicken casserole?

Pretty much the same as regular crack chicken, but folks usually mix in pasta or rice, maybe even a little sour cream or extra cheese, and bake it in the oven till bubbly.

crack chicken served over white rice with bacon and cheese
Comfort in every bite—steamy crack chicken over rice, with bacon and melty cheese
Print

Crack Chicken Recipe

cheesy crack chicken in slow cooker with bacon
Print Recipe
Print Recipe

5 Stars 4 Stars 3 Stars 2 Stars 1 Star

No reviews

Slow Cooker Crack Chicken is rich, creamy, and downright irresistible. Made with tender chicken thighs, cream cheese, cheddar, ranch seasoning, and crispy bacon, it’s the kind of dish that keeps folks coming back for more.

  • Author: Michael Carter
  • Prep Time: 10 minutes
  • Cook Time: 7 hours 10 minutes
  • Total Time: 7 hours 20 minutes
  • Yield: 6 servings 1x
  • Category: Dinner
  • Method: Slow Cooked
  • Cuisine: American
  • Diet: Gluten Free

Ingredients

Scale

2 lbs. boneless skinless chicken thighs (trim off any extra fat)

1 oz. packet ranch seasoning mix

16 oz. cream cheese

8 slices of thick-cut bacon, cooked and crumbled

1 1/2 cups shredded cheddar cheese

1/2 cup sliced green onions

Instructions

  1. Place the chicken thighs into your slow cooker.
  2. Sprinkle the ranch seasoning over the chicken.
  3. Top with cream cheese.
  4. Cover and cook on LOW for 7 hours—don’t peek!
  5. After 7 hours, shred the chicken right in the slow cooker using two forks.
  6. Stir in the cooked bacon.
  7. Sprinkle in the shredded cheddar.
  8. Cover again for about 10 minutes to let the cheese melt.
  9. Garnish with green onions before serving.
  10. Serve over rice, potatoes, buns, or enjoy as-is!

Notes

  • You can use chicken breasts if you prefer a leaner bite, but I swear by thighs.
  • Want a spicy twist? Add a diced jalapeño or use spicy ranch seasoning.
  • Leftovers? Store ’em in an airtight container for up to 3 days.
  • Great for meal prep or potlucks—just double the batch and you’re golden!

Nutrition

  • Serving Size: 1 serving
  • Calories: 690kcal
  • Sugar: 2g
  • Sodium: 1102mg
  • Fat: 53g
  • Saturated Fat: 26g
  • Carbohydrates: 7g
  • Protein: 44g
  • Cholesterol: 275mg

Did you make this recipe?

Share a photo and tag us — we can’t wait to see what you’ve made!

Filed Under: Blog

Bone Broth Recipe

July 9, 2025

Ok, so here’s the deal: I grew up in a kitchen where pots simmered all day long, the windows fogged up from steam, and the smell of beef bones roasting would cling to your clothes like perfume. My Nonna used to say you could tell how good the broth would be just by the way the bones smelled after a good roast—deep, caramelized, almost sweet.

Now look, I’m usually the guy making something sweet like Italian Cream Cake for a Sunday dinner or letting the Ninja Creami work its magic on a hot summer afternoon with something like this Ninja Creami recipe. But when the temps dip and the sniffles start making their rounds? This bone broth recipe is what I’m reaching for.

Every Sunday, without fail, there was a big ol’ pot of something bubbling away on the stove. Sometimes it was her minestrone, sometimes tomato sauce, but when the weather turned cold and folks started sniffling, it was bone broth. And let me tell you—she didn’t need to read a blog to know about bone broth benefits. She just knew it made people feel better. Simple as that.

roasted beef bones with vegetables
Roasted beef bones and veggies bring out bold, rich flavor

These days, it seems like everybody’s talking about it—”best bone broth recipe,” “beef bone broth recipe,” “simple beef bone broth recipe,” you name it. But back then? It was just a way to make the most outta what you had: beef bones from the butcher, leftover veggies, and a whole lotta love.

What I love about this broth (besides how dang good it tastes) is how forgiving it is. No need for perfection. You toss in your beef bones—femur bones, oxtail, knuckles if you got ’em—and let time work its magic. Roasting ’em first? Yeah, that’s a must. That deep, golden color? That comes from those brown, toasty bits stuck to the pan. Scrape every last one into your pot.

bone broth in stockpot
The bone broth starts simmering in a big ol’ pot of goodness

You can cook this bone broth recipe in a stockpot, sure. But if you’re more into that hands-off life? Toss it in your slow cooker and let it bubble away overnight. And yeah, I’ve used the Instant Pot too—a total lifesaver when I forget to start it early (which, let’s be real, happens more than I’d like to admit).

And let’s talk flavor. Some folks try to get fancy and toss every veggie they’ve got into the pot. But listen, the best bone broth recipe? It’s about restraint. Carrots, onions, celery, garlic—done. Let the beef shine. That collagen-rich, golden magic needs space to do its thing.

gelatinous beef bone broth
That jelly-like texture? It means your broth is packed with goodness

I usually make a huge batch, cool it overnight, then skim the fat off the top. Some I keep in jars in the fridge for sipping, some goes into freezer bags for soup nights or to jazz up grains. It’s the kinda thing that just makes everything taste better.

bone broth in mason jars
Stock up your fridge with this simple beef bone broth recipe

FAQs

What should you not put in bone broth?

Skip cruciferous veggies like broccoli or cabbage. They turn bitter and overpower the broth. Same goes for starchy stuff like potatoes. And too many herbs? That can muddy things. Keep it simple.

What bones are best for bone broth?

A combo is king! Knuckles, joints, marrow bones, and a few meaty ones like oxtail or short ribs. Different bones bring different nutrients and flavors.

What is the proper way to make bone broth?

Blanch, roast, simmer, strain. That’s it. Blanching cleans ’em up, roasting builds flavor, simmering does the magic. And don’t rush it. Let it go low and slow for at least 12 hours.

What happens if I drink bone broth daily?

Honestly? Most folks say they feel better overall—maybe it’s the collagen, maybe it’s the ritual. Just make sure it fits your diet and you’re not relying on it for all your nutrition.

bowl of beef bone broth
Sip it solo or stir it into soups—this broth delivers
Print

Bone Broth Recipe

bowl of beef bone broth
Print Recipe
Print Recipe

5 Stars 4 Stars 3 Stars 2 Stars 1 Star

No reviews

A rich and nourishing beef bone broth recipe made with roasted marrow bones, veggies, and spices, slow-simmered for deep flavor and gelatinous goodness. Perfect for sipping or as a soup base.

  • Author: Michael Carter
  • Prep Time: 1 hour
  • Cook Time: 10 hours
  • Total Time: 11 hours
  • Yield: 24 cups 1x
  • Category: Soup
  • Method: Simmered
  • Cuisine: American
  • Diet: Gluten Free

Ingredients

Scale

10 pounds beef bones (mix of marrow, oxtail, short ribs, knucklebones)

4 large carrots, chopped

2 medium onions, quartered

2 whole heads garlic, halved

6 celery stalks, cut into chunks

4 bay leaves

1/4 cup black peppercorns

4 whole star anise (optional)

2 cinnamon sticks (optional)

2 tbsp apple cider vinegar

Water to cover

Instructions

  1. Blanch the bones: Add bones to large pots, cover with water, and boil for 15-20 minutes. Drain and rinse.
  2. Roast the bones and veggies: Place bones, carrots, onions, garlic, and celery in roasting pans. Roast at 450°F for 30-45 minutes, turning once.
  3. Transfer to stockpots: Scrape everything into clean stockpots. Add spices, vinegar, and enough cold water to cover by an inch.
  4. Bring to a boil: Cover and bring to a low boil.
  5. Simmer: Lower heat and simmer with lid ajar for 12-24 hours. Skim foam occasionally and add water as needed.
  6. Strain: Remove solids with a mesh strainer. For extra clarity, strain again through cheesecloth.
  7. Cool and store: Let cool, skim fat, and store in jars. Keeps in fridge for 5 days or freeze for up to 6 months.

Notes

  • Ask your butcher to cut the bones—especially those big femurs.
  • Always blanch beef bones first. It makes a huge difference.
  • Roast until they’re nearly too brown. That’s where the flavor lives.
  • Don’t overcrowd your pot. Use two if needed.
  • Add salt after cooking. Taste and adjust to your liking.
  • Drink it warm with a sprinkle of sea salt or use it in soups, grains, or sauces.

Nutrition

  • Serving Size: approximate per 1-cup serving
  • Calories: 45 kcal
  • Protein: 11g

Did you make this recipe?

Share a photo and tag us — we can’t wait to see what you’ve made!

Filed Under: Blog

  • Page 1
  • Page 2
  • Page 3
  • Interim pages omitted …
  • Page 8
  • Go to Next Page »

Secondary Sidebar

Archives

  • July 2025
  • June 2025
  • May 2025
  • April 2025
  • March 2025

Categories

  • Blog
  • Carrot Cake Recipes
  • Chocolate Cake Recipes
  • Coffee Cake Recipes
  • Cream Cake Recipes
  • Diets
  • Drinks
  • Easy Banana Cake Recipes

Filter by Category

  • Blog
  • Carrot Cake Recipes
  • Chocolate Cake Recipes
  • Coffee Cake Recipes
  • Cream Cake Recipes
  • Diets
  • Drinks
  • Easy Banana Cake Recipes

Filter by Date

Search

Footer

More About Me

Hi, I'm Michael Carter, the face behind Easy Recipes List! I'm a 30-year-old chef from California passionate about making cooking accessible and fun for everyone.

Easy Cake Recipes List

  • Coffee Cake Recipes
  • Carrot Cake Recipes
  • Cream Cake Recipes
  • Easy Banana Cake Recipes
  • Chocolate Cake Recipes
  • Chicken Pesto Bakes Meal Prep

stay connected

  • Facebook
  • Instagram
  • Pinterest

Copyright © 2025 Easy Recipes List — Privacy Policy and Disclosure·